This post focuses on the proper settings for shooting in camera raw with the iPhone 13. It’s geared to photographers like me who are new to the late model iPhones, but are struggling with achieving a workflow that enables them to take advantage of the dynamic range of camera raw for extra latitude in editing on their PC or MAC. It may also be of interest to newbies to the iPhone that might be looking for a tutor to help them understand the menu system and how to select the settings on their new iPhone to capture the best possible photo https://www.davidhoodphotography.com/phototut/ .
Full disclosure, based upon very good reviews of the iPhone 13 camera quality, I just converted from an Android Pixel 2 phone to the new iPhone 13 Pro. As a pro photographer I wanted a camera that I always had with me, and that I could shoot in raw and edit in Adobe Camera Raw and Photoshop CC. My new iPhone definitely meets these needs, but as a new IOS user, it took me a while to discover the proper menu settings.
For new users like me who want to begin the editing process with a raw file (Apple ProRAW in this case), these tips on menu setup may be helpful. However not all of my recommendations will apply to photographers who have no need or desire to shoot in raw format.
First, tap on the Settings menu, tap on your name, and then tap on the Camera menu. Next tap Formats – then turn on High Efficiency, Apple ProRAW, and Apple ProRES (for video).
Tap Settings again to go back to the previous menu. Set Record Video for 4K at 30 fps, and turn ON: 1) Record Stereo Sound, 2) Use Volume Up for Burst, 3) Scan QR Codes, 4) Show Detected Text, 5) Grid, and 6) Mirror Front Camera. View Outside the Frame is a distraction in my opinion and I recommend that it be turned off. Scroll further down and turn on Lens Correction. In the section under Photo Capture, I left Photographic Styles disabled because I choose to capture my photos in “standard” style and edit to my own taste during post processing. I also left Prioritize Faster Shooting disabled because I don’t want risk any degradation of image quality. I further recommend leaving Macro Control off since I’d rather decide which lens to use (the .5X wide angle, the 1X normal, or the 3X telephoto) instead of letting the camera automatically select.
One last and very important step if you want to have the raw file on your camera where you can either edit it with an app such as Lightroom Mobile or Snapseed is to go to Settings, then scroll down and tap Photos, then scroll down to the heading Transfer to MAC or PC. Select the Keep Original option; the Automatic option will NOT transfer the dng raw file back to your iPhone. Once you have the captured raw file on your phone you can connect a cable from your phone to your PC and move the selected raw files (.dng) to a folder on your PC.
My workflow from this point is to open Adobe Bridge (part of the $10/mo Adobe Creative Cloud subscription) and select the dng files to be edited from the folder on my PC. Then I right click on the selected file for raw editing and open that file in Adobe Camera Raw (also part of the Creative Cloud subscription) to edit the raw file. The final step is to open the edited raw file in Photoshop and complete the editing process before saving the edited file as a psd or jpg file ready for printing or sharing on social media.
It’s important to note that if you leave leave the iCloud app enabled on your phone (tap Settings, tap your name, scroll to iCloud), then those large 25Mb raw files will soon fill up your free iCloud storage. So if you shoot a lot of raw photos as I do, you may want to disable iCloud and store your files on an external drive or on another cloud service.
I’ll close with reviewing a couple of things you’ll experience with the iPhone 13 compared to your DSLR or mirrorless camera.
- There are no issues with the iPhone 13 autofocus system unless the foreground is closer than 10 feet. In that case the camera will decide whether to focus on the foreground or the background, in which case one or the other will be less sharp. The good news is that the photographer can make the choice by simply tapping the foreground or background to set the focus point. Note that a firm press will lock both focus and exposure to that point in the picture.
- It’s not surprising that there are some focus limitations because the available apertures are very small (f/1.8, f/1.5, and f/2.8 for the ultra wide, wide, and telephoto lenses respectively). But these apertures, combined with the iPhone 13’s 47% larger sensor than last year’s iPhone 12, provide for amazing low light photography.
- Shooting in the iPhone 13’s Live View mode enables the photographer to shoot short bursts by keeping the shutter depressed, which is an advantage while shooting action shots. But for those of us who want to shoot in raw format, burst shooting via the shutter is disabled. That’s why I recommended above that the photographer enable Use Volume Up for Burst in the Camera settings. This may not be an issues for those who don’t shoot in raw format.
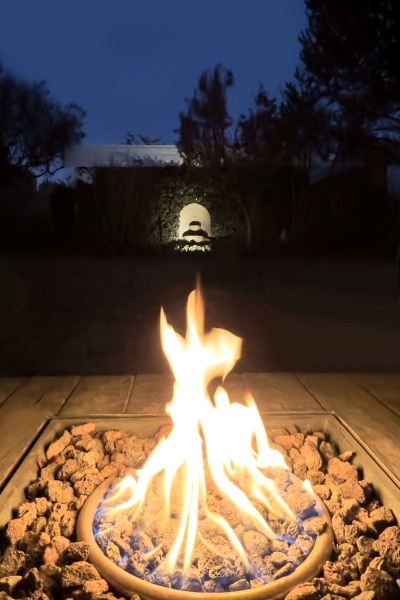
This photo was captured with my iPhone 13 Pro about 30 minutes after sunset using the .5X lens (13mm equivalent) at f/1.8 aperture, 1/50 shutter speed, and ISO 1000. Edited in Adobe Camera Raw and Photoshop.
Capture the Wonders Found in Travel and Life Email: d300dave@gmail.com


