
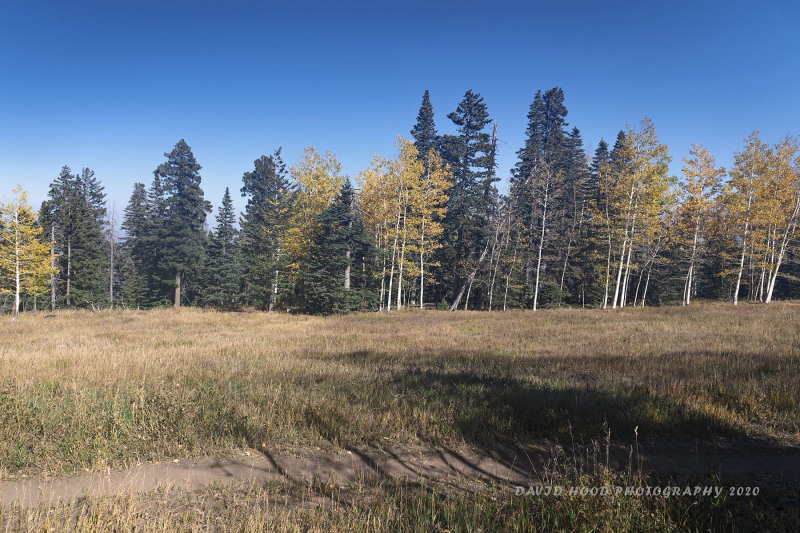
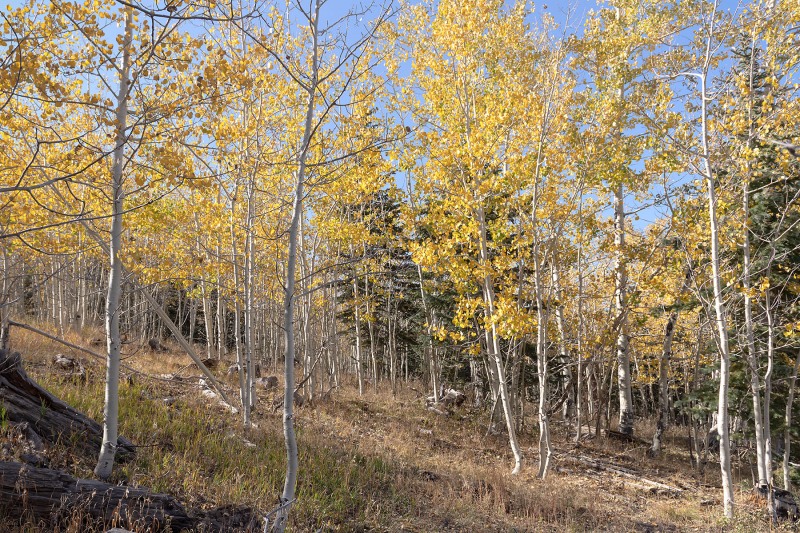
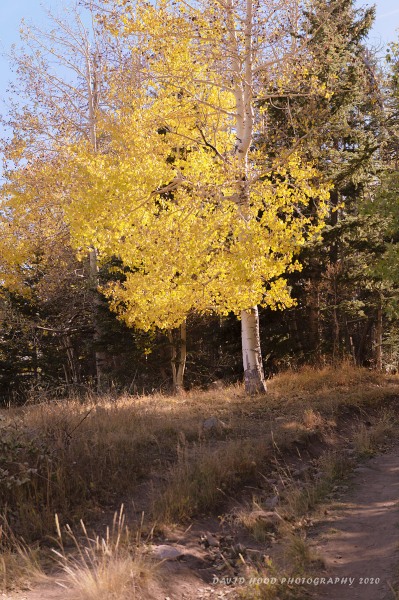
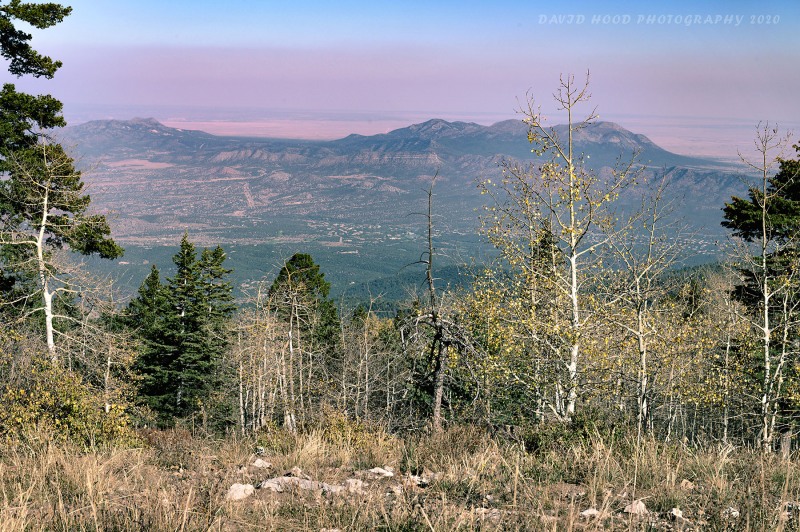
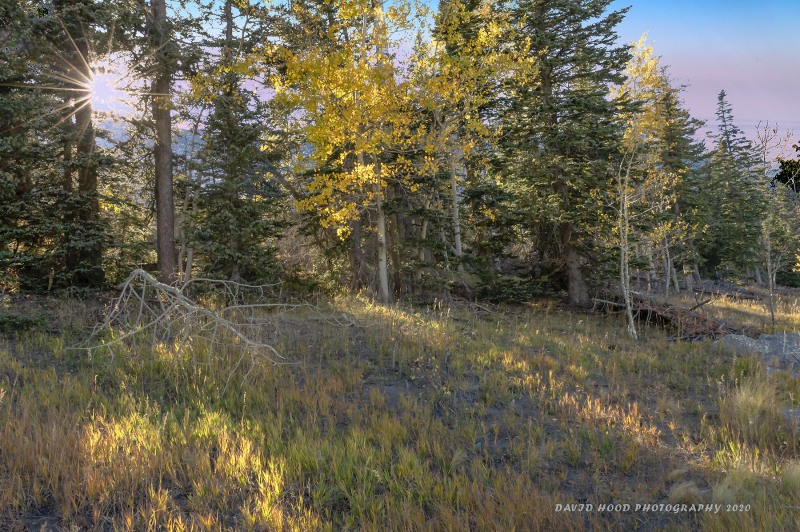
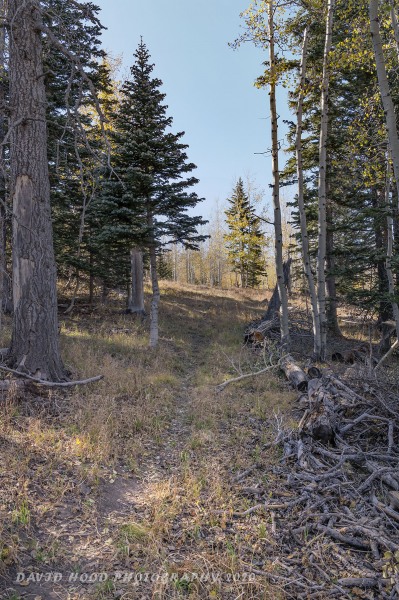
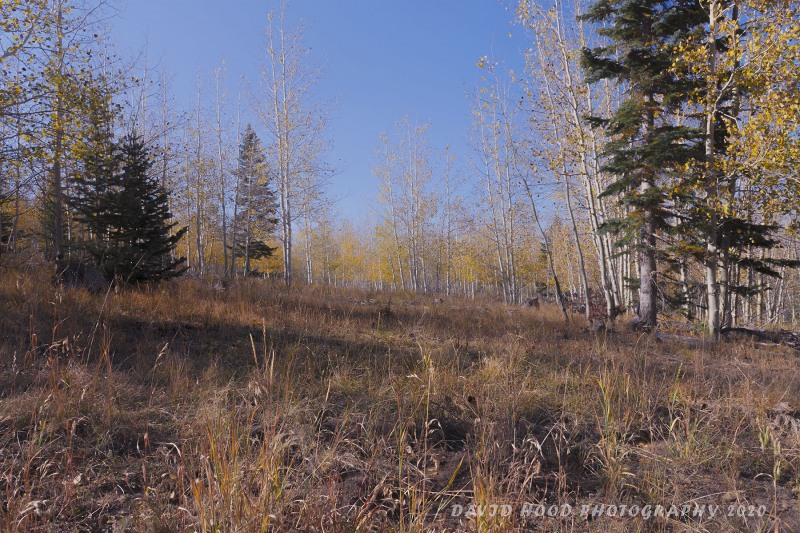
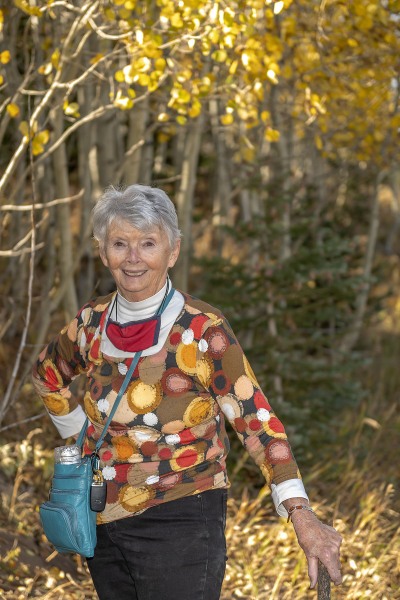
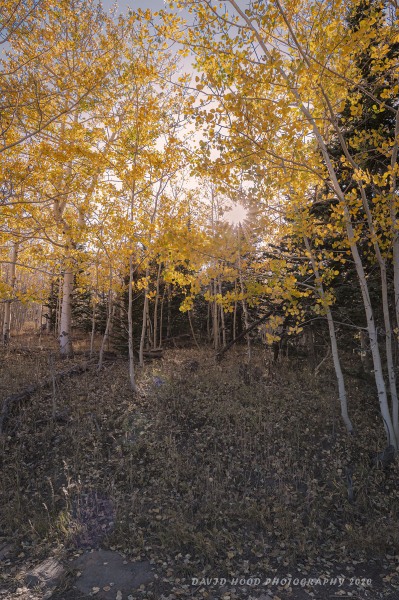
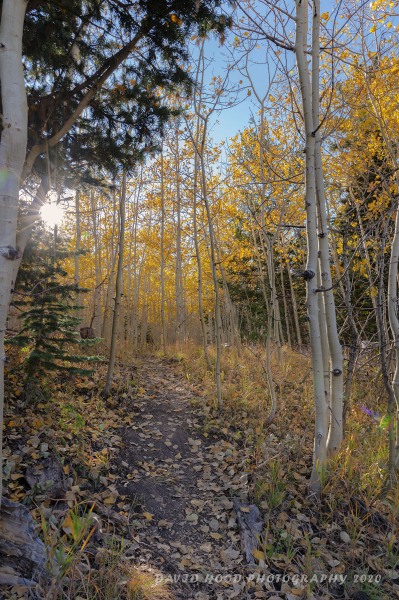
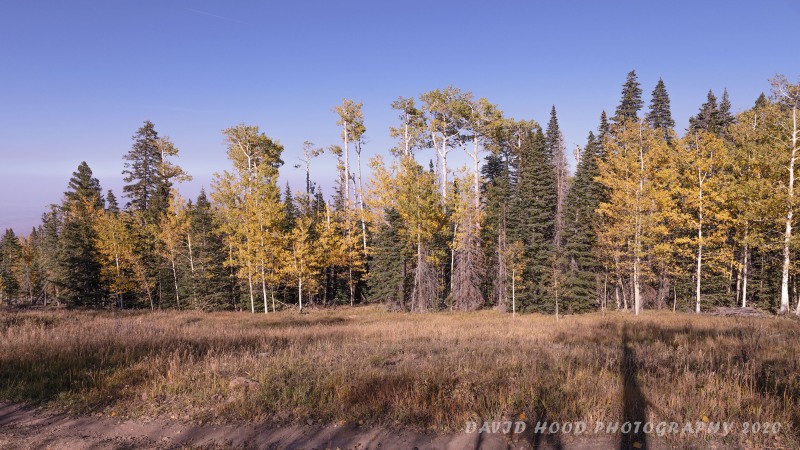
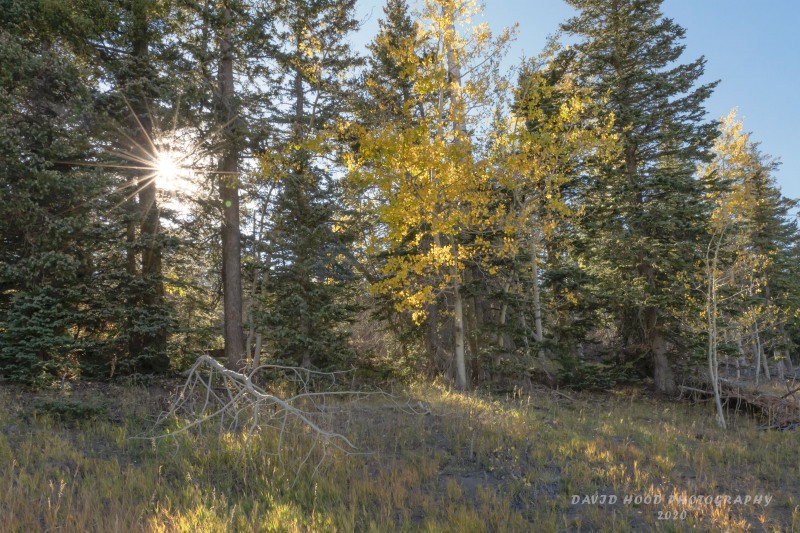
Due to the Covid 19 restrictions and health concerns I haven’t accepted professional photo assignments for over 6 months, so I was gratified to get out and capture some fall colors on the 10K West Trail near Sandia Peak on Highway 586 here in New Mexico. I enjoy sharing my passion for photography and look forward the lifting of restrictions and returning to accepting clients for lessons, headshots and event photography.

Grandson Billy’s Jefferson Middle School “Jets” basketball team defeated their Madison Middle School opponents last evening 37-29, thus completing an undefeated season. Billy (#23 in Red) fouled out in the last 2 minutes of the game but contributed to his team’s win on both offense and defense. https://www.davidhoodphotography.com/jefferson-vs-madison-12-4-19/
I’m an astrophotographer wannabe, but haven’t yet prioritized my time and resources to practice the required skills. So when I came across Serge Ramelli’s free You Tube video “How to Add the Milky Way to your Night Skies Photoshop Tutorial”, I couldn’t resist adding his Milky Way source file to one of my favorite photos taken at sunrise on the Arkansas River in Salida, Colorado.
Milky Way photography requires a dark night sky, so admittedly my composite photo isn’t entirely realistic – but I’d like to think of it as art and not over concern myself with the realism.
The last photo is a Photoshop blended composite of photos 2 and 3 using the approach used by Serge Ramelli in his tutorial. The 2nd photo is my original sunrise photo and the 3rd photo has additional Photoshop editing to turn it from dawn to night in appearance (and thus make it a little more realistic). The 4th photo is a source file of the Milky Way kindly provided by Serge Ramelli as part of his You Tube video.
Capture the Wonders Found in Travel and Life
Email: d300dave@gmail.com

I recently delivered 550 digital photo files captured during the Joint Conference of Librarians of Color Conference held 26-30 Sep at the Albuquerque Convention Center. The theme of the conference was “Gathering All Peoples: Embracing Culture and Community”. I photographed all parts of the conference – registration, exhibits, posters, conferences, luncheons, dinners, awards, group shots,and the dinner/dance gala. The album in my portfolio is a small sample of the events, but my favorite is the one below which in my view embodies the JCLC conference theme. #JCLC2018

I’m looking forward to providing photo coverage of the 3rd National Joint Conference of Librarians of Color September 26-30 at the Albuquerque Convention Center. “Gathering All Peoples: Embracing Culture & Community” is the conference theme. There will be over 100 program sessions, more than 30 poster sessions, exhibits, a gala, and a closing brunch – so I will be a busy guy! #JCLC2018
Potential clients living in the greater Albuquerque area can click on this link to view my Thumbtack profile. Contact me via email below or on my mobile phone at (210) 422-0572 for a quote or information.

http://www.thumbtack.com/biz/david-hood-photography
Capture the Wonders Found in Travel and Life Email: d300dave@gmail.com
We hired Vera Jo Bustos, Director of Operations for the University of New Mexico Lobos Women’s Basketball Team, as grandson Billy’s personal basketball trainer. Vera was kind enough to secure a season press badge for me, and I was excited to use it for the first time on Wednesday evening to shoot a non-conference game with the Lamar Cardinals at UNM’s Dreamstyle Arena (aka “The Pit” due to its below street level location). The Lobos (now 12-1 in non-conference play) won the game handily by a 90-58 score.
The Cardinals (5-5) lead the nation in steals and added 13 more in the Lobos match-up. But UNM senior Tesha Buck (#2) hit 10 shots from down town and scored 40 points as the Lobos over powered the Cardinals. Buck’s 10 3-pointers set a UNM single game record and a Mountain West Division record. The National single game record is 12 3-pointers.
The UNM Lady Lobos next game is on December 28th at Air Force.
Photos of the game may be viewed by clicking here.
I encourage parents of children with a love of the game of basketball to schedule a training session with Vera Jo. You will quickly see significant improvement in your son or daughter’s ball handling skills, shot making, and confidence. Check out VJ’s website for details, testimonials, and scheduling by clicking here.
Capture the Wonders Found in Travel and Life Email: d300dave@gmail.com
The full supermoon won’t technically hit the US until Monday morning (12:45 a.m. PT, 3:45 a.m. ET), but most of the best moon photo ops happen around moon rise and moon set — that’ll be around 5 p.m. ET on Saturday and 7:50 a.m. ET on Sunday.
You will need a tripod, proper exposure settings (ISO, aperture, and shutter speed) and other techniques to capture a good photo. Moreover, a successful capture will require some planning as to location, shooting spot, time of day/night, and lens selection. I’ve found that a smartphone app named PhotoPills (about $10) is a great help in planning your shot. Click this link to a PhotoPills tutorial to help get you started. Happy shooting!
If you live in the Albuquerque area and want to improve your photography, please consider hiring me as your one-on-one camera coach and post processing (Photoshop) tutor. Lessons are tailored to your goals, experience, and the types of photography that most interest you. There is no charge for an initial get acquainted consultation.
Capture the Wonders Found in Travel and Life Email: d300dave@gmail.com
The students that I tutor know that I strongly encourage them to set their cameras to camera raw format. Why? Because when shooting in a format like JPEG, image information is compressed and lost. Because no information is compressed with RAW, you’re able to produce higher quality images, as well as correct problem images that would be unrecoverable if shot in the JPEG format.
This post presents a way to correct one such “problem image” (1st photo) that I took facing the sun. My objective was to capture the starburst effect of the sun coming through the tree branches, so I knew that I needed a small aperture (f/22) and a low ISO (100) to avoid noise. I used my camera meter to adjust the shutter speed (1/25th second) so the the brightest part of the sky just above the sun was underexposed by one stop. I did this knowing that the shadow area camera left would have too much shadow, but I also knew that reducing shadows is less of a problem than reducing blown out highlights. I used a tripod to avoid the inevitable camera shake that occurs when hand holding a camera at stutter speeds less than 1/60th second (at least for me).
Here’s the approach I used to correct this problem image:

1) I opened the raw file in Adobe Camera Raw (ACR is included in the Adobe Photoshop CC Photography package). Then I held the shift key and clicked on Open Object button which opened the file as a Smart Object in Photoshop. Next I right clicked of the file and selected New Smart Object as Copy, and then repeated this step. This left me with 3 open layers: the bottom background layer, the middle Copy 1, and the top Copy 2. Then I right clicked on the middle layer and renamed it “highlights”, and right clicked on the top layer renaming it “shadows”.
2) Next I made both the top layer invisible by clicking on the eye icon just left of the layer.
3) Then I double clicked on the icon in the lower right corner of the open middle layer (named highlights). This re-opened the image in ACR. Next I reduced the exposure and highlights until the sky and sun didn’t look too bright, and then clicked on OK which re-opened that layer in Photoshop with the adjustments applied.
4) Next I made the top level (shadows) active and double clicked on its lower right image icon to open the shadows layer in ACR. From here I increased the exposure slightly, reduced the shadows, and adjusted the white and black settings to taste. Then clicked on OK which re-opened that layer in Photoshop with the adjustments applied.
5) This next step describes how to apply a mask to the middle (highlights) and top (shadows) layers so that further adjustments may later be made in Photoshop to each of the 2 layers independently – for example, applying a cooling photo filter to just the highlights layer. I first clicked on the top layer (shadows) to select it, applied a mask, and then clicked Image (on the top row) and selected Apply Image. This brought up a window which requires the following settings: Layer – Merged, Channel – RGB, Blending – Multiply, and Opacity – 100%. I then repeated this process on the highlights layer, except on this layer I also selected the box marked Invert Layer.
6) You now have a blended image from which you can proceed with your normal Photoshop work flow, such as adding additional adjustment layers for brightness and contrast. Note however that if you wish to make an additional adjustment only to the brightness or shadows areas of the photo, you must “clip” the adjustment mask to that specifically targeted layer. For example to add a warming filter to just the shadows layer, right click on that layer then select add clipping mask. Then select the photo filter and whatever adjustment you add will only be applied to the layer selected.
This is my completed blended image:

If you live in the Albuquerque area and have an interest in improving your digital photography or Photoshop post processing skills, please contact me. I enjoy talking photography, so even if you don’t decide to hire me as your coach, maybe I’ll make a new friend! 🙂
Please feel free to comment and share.
Capture the Wonders Found in Travel and Life Email: d300dave@gmail.com